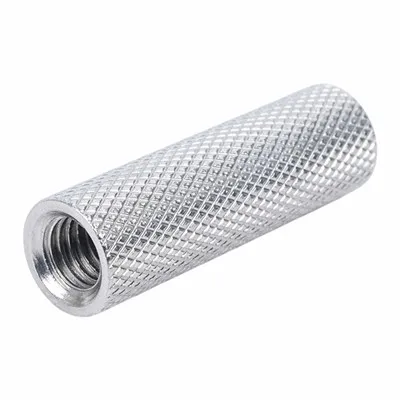
Removing a stuck stud can be a challenging task, but with the right techniques and tools, it can be accomplished efficiently. As a Stud & Bolt supplier, I’ve encountered numerous situations where customers have faced the issue of stuck studs. In this blog, I’ll share some effective methods to remove a stuck stud, drawing on my experience in the industry. Stud&Bolt
Understanding the Problem
Before attempting to remove a stuck stud, it’s essential to understand why it’s stuck. There are several reasons a stud might become immovable. Corrosion is one of the most common causes. Over time, exposure to moisture, chemicals, or harsh environmental conditions can cause the metal of the stud to rust and expand, making it difficult to turn. Another reason could be over – tightening during installation. If a stud is tightened beyond its recommended torque, it can seize in place. Additionally, debris or dirt that has accumulated around the stud can also contribute to the problem.
Tools You’ll Need
To remove a stuck stud, you’ll need a variety of tools. Here are some essential ones:
- Wrenches: A set of adjustable wrenches or socket wrenches is crucial. Make sure you have the correct size to fit the stud. Using the wrong size can damage the stud or the surrounding material.
- Penetrating Oil: This is a must – have. Penetrating oils, such as WD – 40 or PB Blaster, can seep into the threads of the stud and break down the rust and corrosion, making it easier to turn.
- Hammer: A small hammer can be used to gently tap the stud. This can help to break the bond between the stud and the material it’s inserted into.
- Stud Extractor: If the stud is severely stuck, a stud extractor can be a lifesaver. There are different types of stud extractors available, such as spiral – type extractors and square – drive extractors.
- Drill: In some cases, you may need to drill out the stud. A drill with the appropriate drill bits is required for this method.
Step – by – Step Removal Process
Step 1: Apply Penetrating Oil
The first step is to apply a generous amount of penetrating oil to the base of the stud. Make sure the oil gets into the threads. Let the oil sit for at least 15 – 20 minutes, or even longer if possible. This allows the oil to work its way into the rust and corrosion, loosening the stud. You can also gently tap the stud with a hammer while the oil is working. The vibrations can help the oil penetrate deeper.
Step 2: Try to Turn the Stud
After the oil has had time to work, use a wrench to try and turn the stud counter – clockwise. Start with a gentle amount of force and gradually increase it. If the stud starts to turn, continue turning it until it is completely removed. However, if the stud doesn’t budge, don’t force it too hard as this can break the stud.
Step 3: Use a Stud Extractor
If the stud is still stuck, it’s time to use a stud extractor. First, clean the top of the stud as best as you can. Then, select the appropriate size of the stud extractor. Insert the extractor into the center of the stud and use a wrench to turn it counter – clockwise. The extractor will grip the stud and help to remove it. This method requires some patience and careful handling to avoid damaging the surrounding material.
Step 4: Drill Out the Stud (as a Last Resort)

If all else fails, you may need to drill out the stud. This should be done as a last resort because it can be more time – consuming and may damage the surrounding material. First, measure the diameter of the stud and select a drill bit that is slightly smaller than the stud’s diameter. Drill a hole into the center of the stud. Be very careful not to drill too deep or damage the threads in the material where the stud is inserted. Once the hole is drilled, you can use a smaller stud extractor or a screw extractor to remove the remaining part of the stud.
Tips and Precautions
- Safety First: Always wear safety goggles and gloves when working with tools. This can protect you from flying debris and sharp edges.
- Choose the Right Tools: Using the correct tools for the job is essential. Incorrect tools can damage the stud or the surrounding material, making the removal process even more difficult.
- Be Patient: Removing a stuck stud can take time. Don’t rush the process, as this can lead to mistakes and further damage.
- Inspect the Surroundings: Before attempting to remove the stud, inspect the surrounding area for any other components that may be affected. Make sure to take appropriate measures to protect them.
Conclusion
Metal Nut Removing a stuck stud is a task that requires the right tools, techniques, and patience. By following the steps outlined above, you can increase your chances of successfully removing a stuck stud without causing too much damage. As a Stud & Bolt supplier, I understand the importance of having high – quality studs and bolts. If you’re in the market for studs and bolts, or if you have any questions about stud removal or our products, I encourage you to reach out to me. I’d be more than happy to assist you with your procurement needs and help you find the right solutions for your projects.
References
- "Mechanical Engineering Handbook", various authors, McGraw – Hill
- "Automotive Repair Manuals", multiple publishers, covering different vehicle models
Kunshan Haizhijie Precision Hardware Co., Ltd.
As one of the most professional stud&bolt manufacturers and suppliers in China, we’re featured by quality products and good price. Please rest assured to buy customized stud&bolt made in China here from our factory. Also, pricelist is available.
Address: No. 367, Kangzhuang Road, Zhou City Town, Kunshan City, Jiangsu Province, China
E-mail: wzhshui@sina.com
WebSite: https://www.hzhjmetal.com/