If you’ve ever worked in labs, food production, or water treatment, you know how critical a pH probe is—so critical that even the smallest miscalibration can throw off batches, skew test results, or lead to compliance issues. Over the 12 years I’ve spent building and supplying pH probes, I’ve seen firsthand how many people skip or botch calibration, then blame the probe itself instead of the solution. That’s why today, I’m walking you through exactly what a pH probe calibration solution is, why it matters, and how to use it right—plus, as a supplier who’s talked to hundreds of technicians, I’ll share the common mistakes that waste time and money here. PH Probe
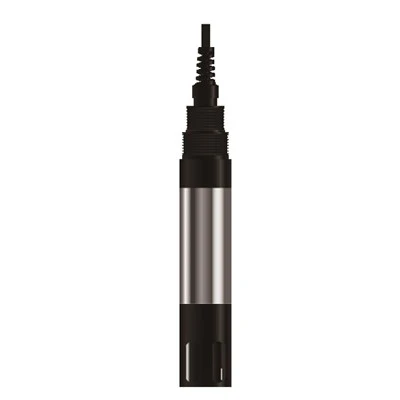
First, let’s cut through the jargon. A pH probe doesn’t “measure” pH on its own; it generates a tiny voltage based on the hydrogen ion concentration in the solution it’s dipped into. That voltage is translated into a pH number, but to get that translation right, the probe needs a reference point. That reference point is a pH calibration solution: a liquid with a precisely known, stable pH value, tested and standardized to within 0.01 pH units or better. These solutions aren’t just tap water with a drop of acid—they’re buffered mixtures, meaning they resist changes in pH when small amounts of acid or base are added, so the reading stays consistent long enough for calibration.
Not all calibration solutions are the same, though. That’s another thing I’ve learned over the years: picking the wrong solution is just as bad as skipping calibration entirely. The most common standard buffers we use (and supply) are three core ones, tied to international standards from organizations like the National Institute of Standards and Technology (NIST) and International Organization for Standardization (ISO): pH 4.01, pH 7.00, and pH 10.01 at 25°C (77°F). Wait, “at 25°C” matters—buffers change pH with temperature, which is why every solution we label includes a temperature correction chart, because a solution at 0°C is slightly different than at 50°C.
Let’s break down when to use which. pH 7.00 is the neutral point—most probes start here, because it’s the middle of the scale, so it’s a good baseline for the probe’s internal electronics. pH 4.01 is for acidic samples: if you’re testing vinegar, fruit juice, or a soil slurry, calibrating with 4.01 ensures the probe reads accurately in the acidic range. pH 10.01 is for alkaline samples: wastewater, soap solutions, or bleach, to nail the upper end of the pH scale. Some technicians skip the second or third buffer, but that’s a mistake. A two-point calibration (7.00 plus either 4.01 or 10.01) works for most routine tasks, but a three-point calibration will catch drift that a two-point misses—especially with older probes or in high-stakes environments like pharmaceutical manufacturing or biotech.
Now, let’s talk about the practical stuff that trips people up. A lot of techs I talk to say, “I just pour a little buffer into a beaker and dip the probe, done.” But there are small steps that make all the difference. First, never use expired calibration solutions. I can’t tell you how many times a customer showed up to a service call with a 2-year-old bottle of pH 4.01 buffer that was already contaminated, and their probe was reading off by 0.5 pH—enough to reject a whole batch of yogurt, for example. Buffers have a shelf life, usually 12–24 months unopened, and once opened, they’re good for 1–3 months, depending on storage. We print the expiration date on every bottle we supply, and we recommend storing them in a cool, dark place, not on a factory shelf in direct sunlight.
Second, clean the probe before every calibration. Even a tiny residue of the last sample you tested—say, sugar from soda or detergent from a cleaning solution—can mess up the buffer’s interaction with the probe’s glass membrane. I tell our customers: rinse the probe with deionized (DI) water, then gently blot it dry with a lint-free lab wipe (not a paper towel, which has leftover fibers that can leave a film on the glass). If the probe has a lot of residue, soak it in a mild cleaning solution (we sell pH probe cleaning solutions too, for this exact issue) for 10–15 minutes before calibrating. That’s a step a lot of people skip, and it’s the top reason their calibration fails.
Third, match the buffer temperature to your sample’s temperature. If you’re testing a hot soup at 95°C, calibrating with a buffer at 25°C will give you a bad reading. Most modern probes have automatic temperature compensation (ATC), but that only works if the calibration buffers are at a similar temperature to the sample. If your lab is at 25°C, let the buffers sit out for 15–20 minutes before use; if you’re working in a cold room, use a heat block or cold block to bring the buffers to the right temp. We include a temperature probe card with every box of buffers we sell, so you can confirm the exact pH of the buffer at its current temp, not just the 25°C value on the bottle.
Now, what about specialty calibration solutions? We get asked a lot about solutions for specific use cases: like low-ionic-strength samples, or high-temperature environments, or food products that have high sugar content. For example, when testing pure water (which has very few ions), a standard pH 7.01 buffer won’t work because the low ionic strength of pure water can cause a “salt error” with the probe. For that, we supply low-ionic-strength pH 7.00 buffers, designed specifically for dilute solutions. For food processing, we have food-grade calibration solutions that meet FDA standards, so you don’t have to worry about contaminants transferring to your product. For high-temperature applications, like industrial boilers, we supply buffers calibrated up to 100°C, since standard buffers degrade at temperatures above 60°C. That’s a big part of what we do as a supplier—we don’t just sell the basic buffers; we tailor solutions to the exact needs of our customers, whether they’re a small craft brewery or a municipal water treatment plant.
Let’s get into the calibration process itself, because even with the right solution, the wrong steps will give you bad data. Let’s use a three-point calibration for a general-purpose probe, which is the most reliable method for most users. First, prepare your three buffers: pH 7.00, pH 4.01, pH 10.01, each in their own clean beaker (don’t reuse the same beaker for different buffers—cross-contamination is another big issue). Rinse your probe with DI water, blot dry, and dip it into the pH 7.00 buffer. Wait for the reading to stabilize—this usually takes 30–60 seconds, depending on the probe. Once the display locks in, confirm it matches the buffer’s pH at the current temperature, then save that point as the first calibration. Next, rinse and blot the probe again, dip it into the pH 4.01 buffer, wait for stabilization, save that point. Then repeat with pH 10.01, save that. Most probes will give you a “calibration error” message if the points are off by more than 0.1 pH, which is a good thing—it means you need to clean the probe or use fresh buffers, not just push through and ignore the error.
A common myth I hear is that you only need to calibrate once a month. That’s not true—how often you calibrate depends on your use case. If you’re using a probe in a high-turnover environment, like a brewery testing beer every hour, you should calibrate daily. For a probe used once a week in a home lab, once a month is fine. Industrial probes used in wastewater treatment might need calibration every shift, because they’re exposed to harsh chemicals that cause drift quickly. We include a calibration log sheet with every pH probe we supply, so customers can track when they calibrated, which buffers they used, and their probe’s readings over time—this helps catch drift before it causes problems.
Now, let’s talk about what happens if you use the wrong calibration solution. A few months back, a craft brewery customer reached out to us panicking because their pH readings for their IPA were off by 0.4 pH, which was making the beer taste too sour. They’d been using a pH 10.01 buffer as their midpoint calibration, instead of pH 7.00. That threw their probe’s calibration off, because 10.01 is far from the neutral point their sample was around. It took them an hour to fix, but it almost cost them a whole batch of beer. That’s why matching your buffer to your sample’s expected pH range is non-negotiable.
Another mistake: using generic household acids or bases as calibration solutions. A lot of people think, “I can just make my own pH 7 solution with baking soda and vinegar.” But those homemade solutions aren’t buffered, so their pH will change as they absorb carbon dioxide from the air, or as you dip the probe in and out. They’re accurate for a few minutes, but not for the stable, standardized reference you need for a probe calibration. That’s why all the calibration solutions we supply are traceable to NIST standards—meaning their pH is measured and certified against international reference materials, so you can be confident in your readings.
As a pH probe supplier, one of the biggest questions we get is, “Do I need a two-point or three-point calibration?” The short answer: two-point works for most routine tasks, three-point is better for high-accuracy applications. Let’s say you’re testing tap water at pH 7.5 for a garden—two-point calibration (7.00 and your expected sample pH, say 6.5 or 8.0) is fine. If you’re testing a vaccine’s pH for pharmaceutical use, where a 0.1 pH difference can change the drug’s efficacy, three-point calibration is mandatory. We always recommend our customers assess their accuracy needs, and we help them pick the right calibration solution and method accordingly.
Now, let’s wrap this up with the most important takeaways, so you don’t make the same mistakes I’ve seen thousands of techs make. First, calibration solutions are standardized, buffered liquids that give your pH probe a reference point to ensure accurate readings. Second, pick the right buffers for your use case: neutral 7.00, acidic 4.01, alkaline 10.01, or specialty buffers for low-ionic, high-temperature, or food samples. Third, use fresh buffers, clean your probe before every use, and match buffer temperatures to your samples. Fourth, calibrate often enough for your environment—daily for heavy use, monthly for light use, and always when you get a new probe or if readings start drifting.

If you’re tired of troubleshooting probe calibration issues, or if you need tailored calibration solutions for your specific application, our team is here to help. We’ve supplied pH probes and calibration solutions to labs, breweries, water treatment plants, and food producers across the country, and we can help you pick the right products for your needs. Reach out to our team to discuss your calibration and pH probe requirements—we’re ready to help you get your measurements right, every time.
Dissolved Oxygen Sensors References
- US Environmental Protection Agency. (2019). Standard Methods for the Examination of Water and Wastewater, 23rd Edition. American Public Health Association.
- National Institute of Standards and Technology. (2022). Standard Reference Materials for pH Calibration. NIST Special Publication 260-185.
- International Organization for Standardization. (2018). ISO 15202: Water quality — Determination of pH. ISO Press.
- Food and Drug Administration. (2021). Baking Safety Requirements for pH Measurement and Calibration in Food Processing. FDA Food Safety Modernization Act (FSMA) Guidance.
Shanghai Multiweal Environmental Technology Co., Ltd.
As one of the most professional ph probe manufacturers in China, we’re featured by quality products and low price. Please rest assured to buy discount ph probe in stock here from our factory. Contact us for custom service and OEM&ODM service.
Address: 5-2, Lane 801, Qiangye Road, Sheshan Town, Songjiang District, Shanghai
E-mail: mtw@shmultiweal.com
WebSite: https://www.multiweal.com/
